
How do you build a wall in an attic door?
- Use a stud finder to locate the studs in the knee wall where you intend to install your storage doors.
- Select a pair of adjacent studs to use as guides for your wall opening.
- Connect the two vertical lines at the top and bottom with a horizontal line.
- Align the tip of a drywall saw with one of the horizontal lines.
Full Answer
How do you make an attic door out of cardboard?
How to Make an Attic Access Door Select a closet ceiling or hallway ceiling with good floor space underneath, since you will need to use a ladder to access your attic. Measure and draw the width between the joists and 28 to 30 inches for the length of the panel. Measure between the joists and cut two boards to fit, one on each side of the opening.
What are the different ways to access the attic?
Mar 01, 2016 · There are holes in the walls of my master bedroom that provide access to the attic. Here's how to create access panels to fill in those holes and make them b...
How do you install a window in an attic wall?
Although this type of attic access door looks similar to a simple attic hatch, it is more convenient with the already built-in ladder. Knee-wall attic access door – Another way to access the attic is through the use of a knee-wall attic access door. This type of door is usually located at mid-height on a short, vertical wall instead of on a ceiling.
How do you attach drywall to an attic access hatch?
Take a 2-foot by 2-foot scrap of OSB or plywood and tack it alongside a rafter so one edge is in contact with the underside of the roof sheathing. Use your short 2-foot level to draw a plumb line down along the scrap of wood. This line must start at the underside of the roof sheathing. Draw a line at 90 degrees to this plumb line along the wood.
How do you frame an attic wall?
0:009:40Building an Attic Knee Wall - YouTubeYouTubeStart of suggested clipEnd of suggested clipThese to the 3/4 inch floor boards. But instead the much more burly beefy structural members downMoreThese to the 3/4 inch floor boards. But instead the much more burly beefy structural members down below the floor joists all right so then I needed a top plate. And I ripped my top plate.
How do you install a wall in an access door?
0:050:55How to Install an Access Panel - YouTubeYouTubeStart of suggested clipEnd of suggested clipTo begin prepare the wall opening hole using the access panel frame as a template check to make sureMoreTo begin prepare the wall opening hole using the access panel frame as a template check to make sure it is level. And trace next cut along the created lines and pop out the panel.
How do you frame an attic access panel?
2:454:59How to Install an Attic Access Door for Insulation - YouTubeYouTubeStart of suggested clipEnd of suggested clipDoor. Pull off the blue tape to get it ready for the trim. This is two and a half inch wide trimMoreDoor. Pull off the blue tape to get it ready for the trim. This is two and a half inch wide trim that we picked up at the local hardware store the 45 degree angles cut at each end of the trim.
How do you finish an attic access?
0:162:31Installing an attic access door # 104 - YouTubeYouTubeStart of suggested clipEnd of suggested clipFrom extra storage space to attic access to run electrical data and surround sound wires. You startMoreFrom extra storage space to attic access to run electrical data and surround sound wires. You start by locating a spot that avoids large runs of wire plumbing or gas lines. You also want to avoid air-
How do you build a door in a wall?
0:073:14How to Build Drywall & Wood Trim Access Panels : Repairing WallsYouTubeStart of suggested clipEnd of suggested clipSo here we have our piece of drywall cut to fit for an access panel right here. So on the back sideMoreSo here we have our piece of drywall cut to fit for an access panel right here. So on the back side I've taken some spare trim and cut it to fit right on the back side.
How do you install plastic wall panels?
0:181:01How to install a Plastic Access Panel Reversable - YouTubeYouTubeStart of suggested clipEnd of suggested clipPlace the access panel against the wall and simply draw around the inner lip of the panel marking.MorePlace the access panel against the wall and simply draw around the inner lip of the panel marking. The spot to carefully cut around your guide for a secure fitting apply adhesive to the inner lip.
How do I install an attic door?
2:415:55How to Install an Attic Access Door - Easy DIY - YouTubeYouTubeStart of suggested clipEnd of suggested clipSpace you're going to want to cut that hole so you're in between the truss. And then you're going toMoreSpace you're going to want to cut that hole so you're in between the truss. And then you're going to want to put boards going perpendicular between the truss.
How do you make a knee wall access door?
0:362:41Kneewall access Door - YouTubeYouTubeStart of suggested clipEnd of suggested clipAgainst a ninety degree angle. The door is going to seal against a 45 degree that way the sides ofMoreAgainst a ninety degree angle. The door is going to seal against a 45 degree that way the sides of the door are unrestricted. When they turn.
Can you cut ceiling joists for attic access?
If your ceiling has joists, you can cut one or more to install an attic fan, a pull-down ladder access or a similar fixture. Cutting joists in the ceiling frame requires the installation of headers that bridge the adjacent joists.
Do attic doors open from the inside?
Attic doors can definitely open by themselves.Dec 17, 2020
Step 1
Select a closet ceiling or hallway ceiling with good floor space underneath, since you will need to use a ladder to access your attic. Move a stud finder across your ceiling to locate the joists. Mark each joist location with a pencil. Your joists should be 16 to 24 inches on center. This is wide enough for a panel.
Step 2
Measure and draw the width between the joists and 28 to 30 inches for the length of the panel. Use a narrow drywall saw and cut along your joist lines first. You should feel the saw touching the side of the joist as you cut. Make your cross cuts using a utility knife. You are trying to save the drywall panel so work slowly to make clean cuts.
Step 3
Measure between the joists and cut two boards to fit, one on each side of the opening. These should be at least 2 by 6 inches in size. Insert each board just beyond the cut line where you removed the drywall. Toenail the board into the joist so that the bottom of the 2-by-6-inch board is level with the bottom of the joist.
Step 4
Cut the drywall 1/2-inch smaller on each side. Cut 1/2-inch plywood the same size as the smaller drywall. Apply construction adhesive and attach the drywall to the plywood.
Step 5
Measure and cut 2-inch trim to fit around the opening in the ceiling. The trim should overhang the opening by a half-inch to three-quarters of an inch toward the center. This will form a lip to hold the access panel flush with the ceiling.
Step 6
Cut insulation to fit on the plywood side of the access panel. Staple twine to the plywood and crisscross the insulation with the twine front to back and side to side without compressing the insulation. You want the insulation to be held in place when the panel is closed.
Step 7
Add wood fill and caulk, and paint your new ceiling trim to match other trim in your home.
What is needed to finish an attic?
Materials required for finishing the attic walls and ceiling. You will require paint, insulation, and boards in 2by4 dimensions. OSB sheets, plywood of 3/4” thickness, screws, and nails.
What is an attic?
The attic is that space in the house, which can be done up in any way the homeowner pleases. But before one can do anything creative and personal, a good finishing to the walls and ceilings is a must. Since the space is limited, a good finish will provide an overall finesse and background to the attic. Read on more to know how to go about finishing ...
What is the best insulation for a ceiling?
Ideally R-30 should be used for a ceiling and R-13 is best suited for the walls. Remember not to compress the insulation between spaces.
Where is the attic door located?
This type of door is usually located at mid-height on a short, vertical wall instead of on a ceiling. Typically found within a small room on the top level of the house, this type of attic access door can be used as a loft, storage area, or even a bedroom. Usually, the ceiling in this room is sloped.
Why is it important to maintain attic access panels?
As it is not always convenient to access and is a truly “out of sight, out of mind” component of any commercial or residential building, pests and molds may affect the attic. That’s why it is important to have regular maintenance for attic access panels.
Why do you need an attic hatch?
Because there are so many options out there, it can be really difficult when purchasing an attic access door. Take note that a proper attic hatch is one that has a weatherstrip around the perimeter to allow for the appropriate amount of insulation. This helps in reducing any loss of heat from the inside while also preventing any air from coming in.
Can you put a lock on an attic door?
Fortunately, a homeowner or building owner can also add a lock to any kind of attic door. In fact, it is recommended for doors on outer walls when it comes to both office buildings and homes.
Do attic doors need insulation?
It doesn’t matter what kind of door the attic has– without insulation, many houses still lose heat through the area. It is for this reason that all attic doors are recommended to be outfitted with some insulation, such as foam board and weather stripping.
Do all buildings have attics?
Nowadays, nearly every building has an attic, and of course, attic access doors and panels. However, there are still some who don’t have attics– whether residential or commercial, thus overlooking the aspect of heat loss and air drafts that attics can provide.
Can an attic hatch get mold?
An attic that does not have proper insulation, ventilation, or even the proper hatch can accumulate mold or mildew. Not purchasing the proper attic access door or taking care of the attic can really impact the space and even affect one’s health in case mold or mildew becomes severe.
Where do end wall studs go in an attic?
The end wall studs extend up from the bottom plate and are attached to the short vertical walls in your attic. If your attic is unfinished and your end wall studs do not fall upon the existing short vertical wall studs, you'll have to nail pieces of blocking in between the existing vertical wall studs.
Do attics have windows?
Gable walls in attics often contain a window or a louvered vent near the peak of the roof. Keeping your new wall parallel will make everything easier for you, trust me. It's now time to install the top wall plates. I prefer to do this by first installing the end wall studs.
Step 1 – Framing of The Top and Sides of The Knee Wall

Step 2 – Insulation of The Attic Ceiling and Walls
- The insulation now needs to be stapled between the studs of the walls and the ceiling beams. Ideally R-30 should be used for a ceiling and R-13 is best suited for the walls. Remember not to compress the insulation between spaces.
Step 3 – Installation of The OSB Walls
- Now using a good quality nail gun, attach the OSB sheets over the insulation, onto the walls. It is crucial to nail into the studs of the wall. Always wear the mandatory safety gear when handling a nail gun.
Step 4 – Finishing The Work Behind The Knee Wall
- In case the homeowner is planning to install a piece of furniture that swings out in this area, then he needs to essentially install the plywood or OSB and cover the insulation.
Step 5 – Attachment of The Laminate
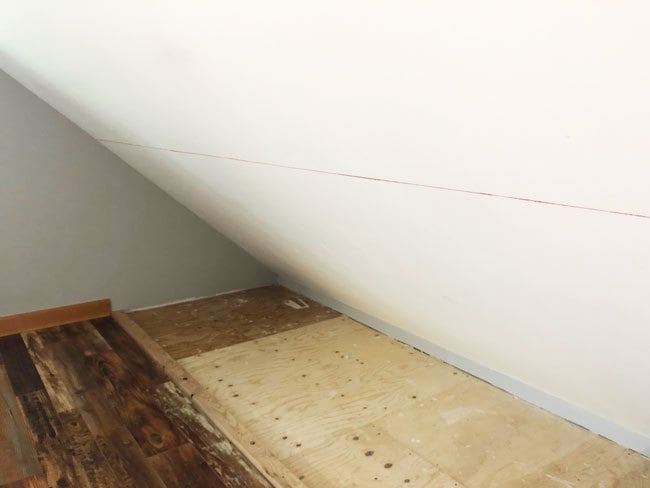
- In the picture you will see that laminate is being used to give the edge a distinct look here. For installation just roll out the contact cement on the surface of the OSB wall. The cement should be allowed to set till the time it gets tacky. When it feels dry to touch, all you need to do is to line it up carefully on the laminate, and let it adhere to the OSB. When dealing with contact cement, there i…
Step 7 – Complete The Installation of The Attic Ceiling
- Once the above mentioned steps are complete, sheets of plywood need to be attached to the insulation. The screws need to be tightly secured in the ceiling joists. The plywood needs to be secured right up to the knee wall.
Step 8 – Use A Primer and Paint on The Attic Walls and Ceilings
- The walls and ceilings are now ready for a fresh coat of primer, followed by a good oil or acrylic based paint. Your attic is now ready to be set up in any way you please.