
Instructions
- Sand and prime if necessary. ...
- Cut a piece of fabric large enough to cover your shelf, plus half an inch on the ends.
- Apply a layer of Mod Podge Matte onto one side of your shelf. ...
- Apply Mod Podge to the front edge of the shelf and carefully fold the fabric over it, smoothing it into place. ...
Full Answer
How do you make decoupage shelves with fabric?
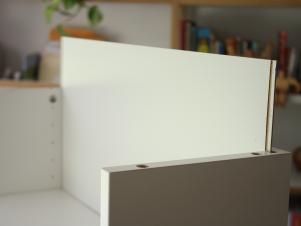
These decoupage shelves are very easy to do. Sand and prime if necessary. If your fabric is thin, you'll want to prime with white so that the color of the shelves doesn't show through the fabric. Cut a piece of fabric large enough to cover your shelf, plus half an inch on the ends. Apply a layer of Mod Podge Matte onto one side of your shelf.
How do you decoupage a piece of paper?
Next, lay the initial piece of paper onto the object, smoothing it gently with your fingers to remove any wrinkles or air bubbles. Once you’re finished, apply another thin layer of decoupage medium on top of the paper, then allow both layers to dry completely, undisturbed.
How do you decoupage over IKEA shelves?
Start by sanding and priming your shelves (if necessary). The color of the shelf will show through the fabric you decoupage onto it, which is how you’ll know if priming is needed. My shelves are those ekby bjarnums from IKEA, in the dark finish, with brackets covering the left and right-facing ends.
How do you cover a shelf with modge Podge?
Cut a piece of fabric large enough to cover your shelf, plus half an inch on the ends. Apply a layer of Mod Podge Matte onto one side of your shelf.
How To Decoupage Corner Shelf
This image seems OK but if you will look at the BEFORE image, Then you will appreciate it more. Actually this wooden shelf installed in the corner of the room & then the room wall paint done. There were paint stains and spots all over this wooden corner shelf. I wanted to paint it in golden color as the curtains of this room are in golden shade.
Applicator or spatula
I measure the shelf space where I was going to paste the sheet. Then I cut some circle motifs from the sheet accordingly. Cutting takes hardly 10 minutes & in 5 more minutes pasting was done. This is just 15 minutes project & super easy too. All you need to do is CUT & PASTE. That’s it.
How to make a book shelf look antique?
To create an antique effect on your bookshelf, apply a light brown glaze–one part light brown paint to four parts water--to the paper pieces after they are affixed to the bookshelf. Let the glaze dry and then apply the three coats of Mod Podge as a protective finish.
How to make a book shelf with paper?
Spray the back of the paper pieces, one at a time , with a light coating of spray fixative. Then press the paper pieces against the bookshelf, moving the pieces around until you are happy with your design. The fixative allows you to easily lift and move the paper pieces without leaving any residue behind.
How many coats of modge podge to a bookshelf?
Apply three coats of Mod Podge to the entire bookshelf, allowing the glue to dry thoroughly between coats. Each coat will provide an added sheen to the bookshelf--your new papered masterpiece.
How to clean a book shelf?
Mix a solution of mild dish soap and warm water. Wash the bookshelf with a sponge so that it is completely free of dust, dirt and stains . Let the shelf dry.
How to remove air bubbles from bookshelf?
Apply a thin layer of Mod Podge onto the bookshelf with a foam brush. Press the paper pieces onto the shelf, smoothing them out with your fingers to remove any air bubbles.
What can you do with Decoupage?
I have seen so many amazing furniture pieces or any kind of accessories where people used decoupage. You can make a unique piece out of something so ordinary. And this is what I love about it – making a piece unique.
What does decoupage mean in French?
Decoupage sounds pretty fancy but it just means ‘to cut out ’ in french. I also know a similar method to work with cutouts and glue which is called pappmaché. Maybe you have heard of this?
How to make a napkin with glue?
apply the glue with a brush. Apply a layer of your self-made glue or the Mod Podge. Then arrange the napkins onto the glue the way you decided before . Smooth the napkins as well as you can with your fingers, a plastic scraper, or a roller. Wrinkles can be sanded out after the glue is dry if you like it smooth.
How much is a bottle of modge podge?
A small bottle of Mod Podge is between 7 and 10 Dollars, a bottle of school glue about 1 Dollar.
How to decouple napkins?
This is how to get started with decoupage: If you have decided that you are going to start with napkins, then peel your napkins apart. Most napkins have 3 layers and you just want the one layer with the pattern . Don’t get frustrated if some don’t come apart, just be patient and try to peel them apart on different corners.
How to make a drawer with wrapping paper?
Start with a drawer and wrapping paper. Start by pre-cutting the paper to fit the inside of the drawer. Next, apply the glue to the wood first with a brush and then lay the paper on top of the glue. Smooth it out with your fingers or a roller. Make sure that all of the paper contacts the glue with no air pockets.
How to make a sandbox?
This is what you need: 1 1 bottle 6 oz. of white craft glue (school glue) 2 1/3 cup water 3 glass container, jar with lid 4 add the glue and the water into the glass container, close it and shake it well 5 You just made your glue.
What to use to spread decoupage?
Foam brush : Use this to spread the decoupage medium or glue onto the item you will decoupage. If you don't have a foam brush , you can use an ordinary paintbrush or even a cotton swab.
What can you add to decoupage?
Decide what object you wish to decorate with decoupage. You can add pictures to almost anything: furniture, photo albums, shelving, frames, boxes, vases, mirrors, hardcover books, trays, suitcases, dishes, candles, cans, bottles, egg cartons, rocks, and much more.
How to clean up glue?
Damp rag : Keep one nearby to wipe up excess glue and to help with other clean up. Make sure the rag is damp and not soaking wet when using it to remove excess decoupage medium from your glued papers. A damp rag also helps to keep your hands clean while working with glue.
What glue do you use for decoupage?
You should have at least one of those in your craft cupboard, but in a pinch, slightly diluted white glue will do.
How to glue a picture to a large picture?
Use your finger to gently push down the picture (for a large picture, start from the center and work your way out) and push out any wrinkles and excess medium. You can also use a bone folder or brayer to do this. The Spruce / Rita Shehan. Continue with the last two steps until all of your pictures are glued on.
How to decouple a picture?
To get started with decoupage, you cut out pictures and glue them onto an object. The next step is to cover the object and pictures with a few coats of glue or decoupage medium to protect it. You probably have everything you need to make your project lying around your home right now. Gather your supplies and start crafting .
How to decoupage pictures before glue?
Before you add glue, arrange the pictures onto the item you are decoupaging until you like the way they look. The pictures can be in any placement you like and can also overlap. Working in a small section at a time, remove the pictures and apply a generous layer of decoupage medium onto the item you are decoupaging.
How to decoupage furniture after it has dried?
Once it has dried, proceed to apply the sealer. If you want your design to look as if it were painted on, repeat the process of buffing, cleaning, and sealing as many times as needed to achieve the desired appearance. Almost any furniture or home accent can be updated through decoupage.
How to seal a decoupaged surface?
Before you do so, gently buff the decoupaged surface with steel wool, then clean it with a damp cloth. Once it has dried, proceed to apply the sealer. If you want your design to look as if it were painted on, repeat the process of buffing, cleaning, and sealing as many times as needed to achieve the desired appearance.
What is the first step in decoupage?
The first step of any decoupage project is to prepare the object you plan to transform. Repair any surface imperfections—whether scratches, gouges, or bona fide holes— and if applicable to the material with which you are working, sand the object to a smooth finish.
What is decoupage in art?
The fancy French word decoupage refers to the simple act of gluing paper or fabric cutouts onto an object. The results can be magical; once varnished, the glued-on design looks as if it were inlaid. For hundreds of years, people have been experimenting with decoupage, and in expert hands it’s truly an art form.
