Steps to install:
- Take out the wrap from the packaging. Use the exhaust wrap calculator in the Tech section of our website to make sure...
- You may soak the wrap in water first to make easier to wrap the pipe tightly but this is not necessary.
- Start by wrapping the desired pipe with about ½” overlap depending on the width of wrap you are using then secure your...

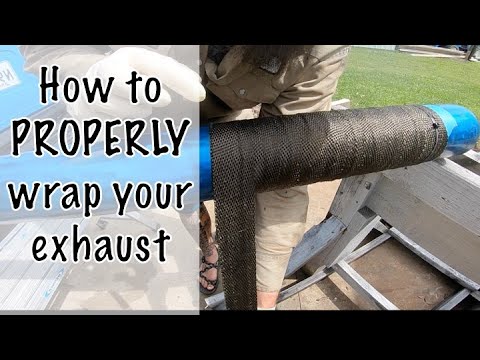
How to correctly Wrap Your exhaust?
- Motorcycle wrap
- Metal ties/clamps
- Water
- Exhaust gaskets
How to install dei Exo series exhaust wrap?
wrap the pipe. 5. Continue to wrap tightly using a ¼” overlap. When reaching the exhaust flange, fold the end inward forming a triangle to prevent fraying. Secure with a DEI Stainless Steel Locking Tie or clamp. Top Tip: For easier tie installation consider using the DEI locking tool (010220). 6. If desired, apply DEI High Temp Silicone Paint.
How hard is it to install an exhaust system?
_A couple of sockets, a few wrenches and some copper-based antiseize compound are all you should need to install most exhaust systems. _ _Before removing the stock system, do a quick inventory of the new stuff. It sure beats getting halfway through the job before realizing a crucial part is missing.
How to install MBRP exhaust systems?
Stock
- Better sound Unique MBRP sound Range of sound profiles across segments Customize sound with additional components
- Increased air flow Performance gains Better fuel economy Less stress on engine adding longevity
- Rust resistant Industry leading T304 Stainless Steel Options for all weather conditions Trusted by racing teams everywhere
How do you install heat wrap on exhaust?
Start an initial wrap around around the primary tube at the exhaust port (closest to the engine) and secure it with a stainless steel tie or a hose clamp. Continue wrapping, using 1/4" overlap with each pass; keep tension on your wrap and use your hands every two to three coils to tighten the wrap.
Do I need to soak exhaust wrap?
0:000:38Do not soak wrap! - YouTubeYouTubeStart of suggested clipEnd of suggested clipWhen working with our traditional glass fiber wraps don't soak it in water or submerge it in aMoreWhen working with our traditional glass fiber wraps don't soak it in water or submerge it in a bucket or completely soak the wrap. There's a proprietary coating on it you could wash off if you soak it
Does exhaust wrap ruin pipes?
It's hard on pipes. Wrap can cause excessive heat and hold and trap moisture and detritus against your exhaust, which will shorten the life of the exhausts. Most manufacturers consider pipe wrapping to be abusive and will not honor warranties for wrapped exhausts.
How do you seal an exhaust wrap?
0:451:48High Temp (HT) Silicone Spray - YouTubeYouTubeStart of suggested clipEnd of suggested clipA few important things to remember when applying. Make sure the rap is dry before you apply theMoreA few important things to remember when applying. Make sure the rap is dry before you apply the coating. Always use in a well-ventilated area shake the can before use and periodically during the use.
What do you spray on exhaust wrap?
0:541:17Exhaust Wrap in three easy steps - YouTubeYouTubeStart of suggested clipEnd of suggested clipTo seal em protect the rap spray with HT silicone coating start by spring about six inches away fromMoreTo seal em protect the rap spray with HT silicone coating start by spring about six inches away from the pipe. And spray using a sweeping motion coat. The entire wrap.
How long does exhaust wrap take to dry?
This is completely normal as the wrap burns off all the volatiles (starch in the yarn, which enables it to be weaved). It will take about 10 minutes before it's completely dry and cured. Now this is a palaver but once it's cooled down, you'll need to remove the exhaust again.
Are exhaust wraps worth it?
An exhaust wrap is a fantastic heat protection product. In addition to making your header look great exhaust wraps also give you performance enhancements. You will see a reduction in temperatures around the exhaust resulting in more horsepower. This increase in horsepower is down to increased engine efficiency.
Does exhaust wrap change sound?
So, does exhaust wrap reduce noise? Exhaust wrap is not specifically designed to reduce the noise coming from a car's exhaust since its main purpose is to keep heat from escaping. However, the material has sound dampening effects that are able to reduce higher frequencies as opposed to lower frequencies.
How much heat does exhaust Wrap reduce?
50%Exhaust wraps can reduce up to 50% of the amount of heat radiated by exhaust pipes, while at the same time increase exhaust gas temperatures or EGTs. Increased EGTs lead to increased exhaust gas velocities, which improve exhaust system performance and scavenging of exhaust gases from the engine's cylinders.
Do you need silicone spray on exhaust wrap?
Ht Silicone Coatings solve the problem of exhaust wraps deteriorating because of dirt and debris hitting it. It seals and protects wraps and extends the life of the wrap. The High Temperature (HT) Silicone Coating provides lasting protection for any hot surface up to 1500 degrees.
How do I stop my exhaust wrap from fraying?
1:033:27How to keep your DEI header wrap from fraying. - YouTubeYouTubeStart of suggested clipEnd of suggested clipBut you're just going to apply the superglue and a line where you're going going to want to cut nowMoreBut you're just going to apply the superglue and a line where you're going going to want to cut now unfortunately this superglue I have to push on this plunger to get it to come out.
How do you wrap headers with exhaust wrap?
0:514:06How to Wrap Your Exhaust/Headers/Manifold - YouTubeYouTubeStart of suggested clipEnd of suggested clipStart. The first revolution by overlapping the entire end and pulling tight the next revolution ofMoreStart. The first revolution by overlapping the entire end and pulling tight the next revolution of wrap. Continue to tighten each revolution of wrap with a quarter inch overlap in mind. After.
Steps to install
Take out the wrap from the packaging. Use the exhaust wrap calculator in the Tech section of our website to make sure you have enough wrap to cover your project.!
Maintenance and Cleaning
When cleaning your wrap DO NOT use a pressure washer or high pressure water of any sort as it an loosen the exhaust wrap fibers. Instead take a damp cloth and wipe debris or dirt from the wrap.
Why do you apply extra pressure on the edges of a wrap?
When you apply extra pressure on the edges of the wrap, it lessens the risk of them lifting. You may be thinking you are ready to get to it and use the wet application method. However, there are a few more suggestions to follow when it comes to which type of film to use for this process.
Why do wet wraps work?
Inexperienced installers often use the wet wrap application method because the process is easier and more forgiving compared to the dry technique. While it’s not recommended for convex and concave surfaces, the wet method applies better to flat areas. For example, if you are applying graphics to windows or smaller portions of vinyl to your car, the wet method is ideal. It has the advantage of resulting in no creases or bubbles — which is great for first-timers as the process may be complicated for you to perfect right away.
Why do wet wraps need fluid?
Wet wrap methods require application fluid to help the vinyl float on the surface during the adhesion process. The fluid prevents pre-adhesion, meaning the material won’t stick to your car before you’re ready. So if this is one of your first installations, you’re in luck!
What is the difference between dry and wet wrap?
Wet wrap application method. The only difference between the two methods is straightforward. Dry wraps don’t use fluid applicators, while wet ones do. And like all things in life, there are pros and cons to each technique, and the different applications suit specific styles. A vinyl wrap gives you the freedom to customize your entire vehicle ...
What are the negatives of dry wrap?
The negative possibilities of using the dry method include: If the vinyl touches the substrate before you’re ready, you will have to lift it and reposition the film instead of sliding it around. It may raise the paint off your car or warp the pattern of the vinyl .
Can you use wet wrap on unpainted metal?
Never use the method on unpainted metal with reflective or metalized products. In this case, the fluid can cause corrosion, de-lamination of the film and make it blacken. Use the wet wrap method if you are using transparent or translucent vinyl. You should avoid wet wrap application if you can use the dry method.
Is it better to dry wrap or dry wrap?
The positive outcomes of using the dry wrap method are also why it’s the more popular of the two techniques. The pros of the dry application are as follows: It is a more straightforward process when you apply vinyl around curves. It’s a faster and cleaner technique. The dry method saves you time and money.