Quick Start Tutorial
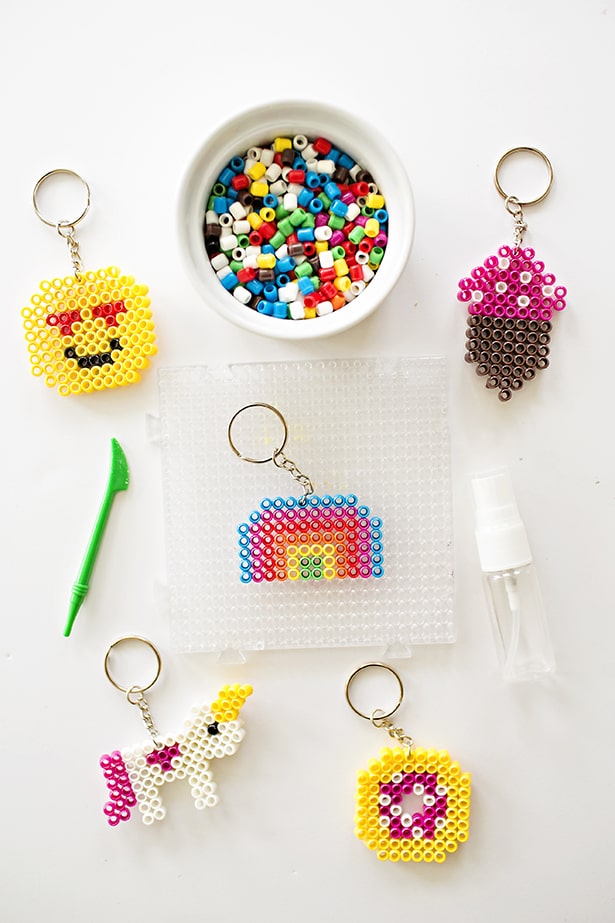
- #1 Gather Your Supplies! First, you'll need a flat, stable area to make your fuse bead design. ...
- #3 Bead Your Pattern! Use your tweezers or fingers to place the beads on the pegboard. ...
- #5 Melt the Other Side! If you like the the unmelted side look, you can skip this step. ...
Full Answer
How to make a good fuse?
How to Make a Fuse.
- Stuff You Need.
- Making the Liquid. Potassium Chlorate 33 parts, Potassium Nitrate 33 parts, Sugar 24 parts, Powdered Coal 10 parts. ...
- Coat the String. The title says it all. get the sring and heavly coat the string then wipe off excess with fingers.
- Make the Stuff! (optional).
- WARNINGS! Ok I forgot to put this in before. ...
How to change a fuse in a traditional fuse box?
How to change a fuse in a traditional fuse box. If you live in an old property, it may still have a traditional fuse box that contains fuse carriers and wire. If you blow a fuse, you’ll need to replace the wire. You can buy fuse wire from a hardware store. Just make sure it’s the same amperage as the fuse wire you’re replacing. To change ...
How do you keep beads from fading?
How do you keep beads from fading? Coat your beads with clear acrylic spray paint before working with them. If you’re working with seed beads, one way to do this is to pour them into a plastic zip bag, spray a bit of paint into the bag, shake the bag to coat the beads, and pour them onto plastic sheeting to dry.
How do I organize my beads?
- Removable compartment bins. ...
- See-through lids. ...
- Sturdy, secure latches. ...
- Compartments that fit snugly against the lid to prevent seed beads from "leaking" into adjacent bins. ...
- Comfortable handles. ...
- Easily portable and extremely durable. ...
How do you make fusible beads?
STANDARD FUSING METHOD: An adult should do the fusing. After you have created your design, place your pegboard on a flat, heat-safe surface. Set a household iron to the medium setting. Place ironing paper over the pegboard. ... Remove the paper and bead design from the pegboard.
What do you need for fuse beads?
1:184:30How to Perler Beads for Beginners - YouTubeYouTubeStart of suggested clipEnd of suggested clipI find that these are the best for me some people use their fingers some people use toothpicks someMoreI find that these are the best for me some people use their fingers some people use toothpicks some people just use a regular tweezers that they have in their cupboards.
What paper do you use for fuse beads?
parchment paperEither parchment paper or wax paper work well as reusable ironing paper. You may not need to buy them separately as some beads packages (e.g. Perler Tray Of 4000 Beads With Idea Book ) already include ironing paper.
How do you make a fused bead kit?
0:036:12How to melt Perler Beads/ Hama Beads/ Melty Beads - YouTubeYouTubeStart of suggested clipEnd of suggested clipSound like you are there. And you stick them onto these pegboards. And then you can make a pattern.MoreSound like you are there. And you stick them onto these pegboards. And then you can make a pattern. And then you earn them and they melt together into this so they're all stuck. Together.
Are fuse beads the same as Perler beads?
There are many Perler Bead knock-off brands such as Hama Beads, Melty Beads, Beads, and Pyssla Beads. Collectively, all these beads are commonly called, “Iron Beads” or “Fuse Beads,” which are general terms for being melted together.
Can you use parchment paper for fuse beads?
Take your parchment paper, which is also sometimes called ironing paper, and place it over the beads on the pegboard. You should be careful when doing this so that you don't accidentally knock any beads out of place. Heat a dry iron to a medium setting, then slowly run it in a circular motion over the parchment paper.
Can you use wax paper with fuse beads?
Can You Iron Perler Beads With Wax Paper? The Answer is NO! You need to use parchment paper.
Do you melt both sides of Perler beads?
0:566:42How to iron Perler beads flat without warping - YouTubeYouTubeStart of suggested clipEnd of suggested clipSo my favorite surface to iron on is actually directly on my laminate. Countertop. If you don't haveMoreSo my favorite surface to iron on is actually directly on my laminate. Countertop. If you don't have a countertop that you're comfortable ironing on you can get one of these flexible silicone baking
Can I use aluminum foil for Perler beads?
Tear off a large piece of aluminum foil, forming it into a freeform dish shape. If desired, place it inside an oven-safe bowl to help it hold its form. Spray a light coating of vegetable oil on the inside of the aluminum foil dish. Place the Perler beads in the foil dish, and arrange them in the desired configuration.
How long does it take for water fuse beads to dry?
Let your design air dry for a minimum of 60 minutes.
How do you make Perler beads without a pegboard?
0:432:47How to use the masking tape method for Perler Beads Tutorial - YouTubeYouTubeStart of suggested clipEnd of suggested clipNow all you have to do is to take your masking tape. And tear a little bit off just enough to coverMoreNow all you have to do is to take your masking tape. And tear a little bit off just enough to cover the whole length of your creation. And to place it gently on your creation.
How are Perler beads made?
Perler Beads are plastic fusible beads. They're made from a food-grade plastic called low-density polyethylene. They don't contain harmful chemicals. The beads are arranged on pegboards to form patterns and then fused together with heat from a clothes iron.
Do you need an iron for Perler beads?
But you need to iron it long enough that the beads fuse together. Some prefer to melt the perler beads so that you cannot see the openings in the beads. Some prefer to iron them just enough so that they are together, but so that you can also still see the individual beads.
How do you get Perler beads to stick together?
Heat a dry iron to a medium setting, then slowly run it in a circular motion over the parchment paper. You'll have to continue this for about 10 seconds for the beads to stick together.
Can I use aluminum foil to iron Perler beads?
Tear off a large piece of aluminum foil, forming it into a freeform dish shape. If desired, place it inside an oven-safe bowl to help it hold its form. Spray a light coating of vegetable oil on the inside of the aluminum foil dish. Place the Perler beads in the foil dish, and arrange them in the desired configuration.
Do you melt both sides of Perler beads?
0:566:42How to iron Perler beads flat without warping - YouTubeYouTubeStart of suggested clipEnd of suggested clipSo my favorite surface to iron on is actually directly on my laminate. Countertop. If you don't haveMoreSo my favorite surface to iron on is actually directly on my laminate. Countertop. If you don't have a countertop that you're comfortable ironing on you can get one of these flexible silicone baking
Step 1: Open MirthMosaic Perler
Download and open the Excel file provided here. You will likely have to approve macros in order to use it; look for a button allowing you to do so when you first open the file.
Step 2: Reading in the Image
MirthMosaic will then open your image file and pixelize it to the resolution you have chosen. This will take several seconds, because hey, Excel wasn't made for graphics work.
Step 3: Mapping to a Fuse Bead Palette
Click on any row in the box of available palettes to see what your image will look like with that palette.
Step 4: Customizing Your Palette
See the image here. MirthMosaic has a sheet called "Pallette" containing a list of the names and sample colors of the common Perler beads. By manipulating the 1's in columns J through L, you can create your own custom palettes. Simply enter a "1" for every bead color you wish to include, and leave empty any bead you wish to exclude.
Step 5: Purchase List
On the "Purchase List" tab, you will find the exact number of each color of bead you need to complete your mosaic. If your mosaic plan calls for 350 raspberry beads but you have only 200, you have 2 options:
Step 6: Printing Your Plan
On the "Solution Indexes" and "Solution Indexes Reversed" sheets, you will find printable plans for your mosaic. To save on printer ink, you may wish to select the plan and clear the cell colors, leaving only the numbers. This will make it slower to assemble your mosaic, however.
Step 7: Completing Your Project
As always with fused bead projects, you will need to melt the beads with an iron over parchment paper in order to lock it in place. Take your time-- You've invested a lot of effort in the layout, and don't want to ruin it by jarring beads loose or burning them.
