- Build the Form. Photo: diynetwork.com Start by determining the dimensions you want the countertop to be. ...
- Reinfornce the Form. Photo: shutterstock.com Now lightly coat the melamine frame interior with olive oil; doing so will let the concrete slip more easily from the frame later ...
- Mix the Concrete. Photo: shutterstock.com When you’re ready to mix concrete for the project, closely follow the manufacturer’s instructions.
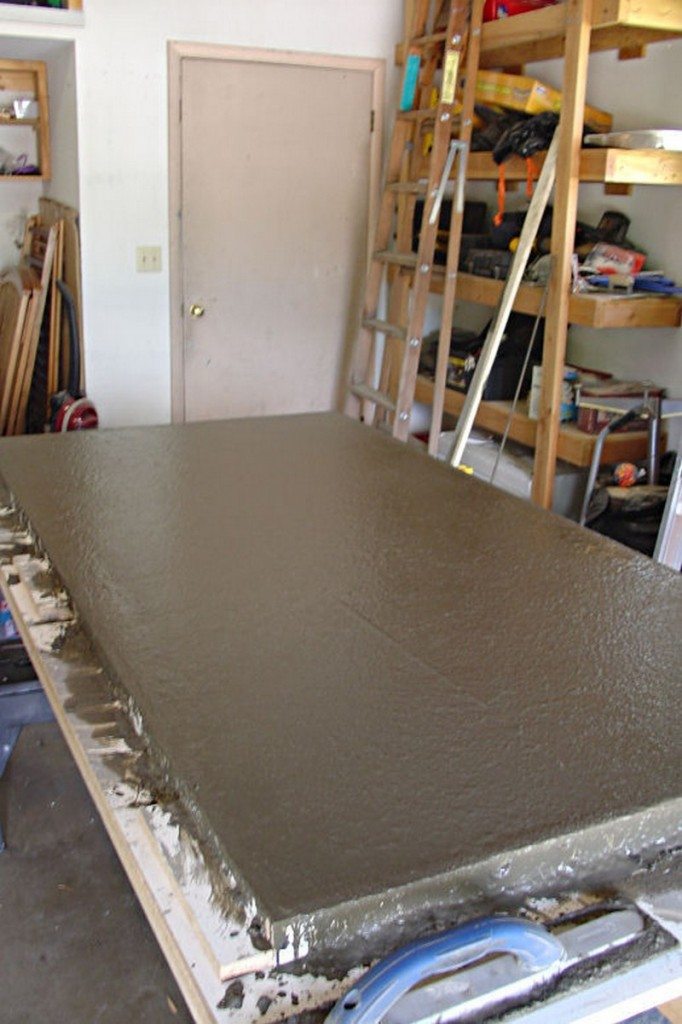
- Pour the Concrete. Photo: shutterstock.com Pour enough concrete into the form to fill its volume completely, then use your hands to work the material along the edges and ...
- Remove the Form. Photo: hgtv.com Lay a plastic sheet over the concrete to prevent it from losing too much of the moisture it needs to cure properly.
- Finish the Job. Photo: hgtv.com There’s a good chance at this point that small cracks or bubbles may be visible in your countertop.

How to create a faux marble countertop using concrete?
Materials Needed to Make Faux Marble Countertops:
- Step One: Remove fixtures Remove sink faucet and fixtures. ...
- Step Two: Prep surface Clean the countertop thoroughly with some sort of degreasing cleaner. ...
- Step Six: Remove tape Once you’ve applied your feather finish to the flat top, remove the painters’ tape even before moving onto the side surfaces. ...
- Step Ten: Clean
How to create and install concrete countertops?
Pour the Concrete
- Scoop, shovel or pour the concrete into the countertop form. ...
- Wear hand protection and press the concrete mix into corners to ensure proper coverage, eliminate any large air pockets and roughly make level.
- Place the re-mesh on top of the mixture, keeping it about 2 inches from the sides.
What type of concrete do you use for countertops?
- Match the mix to your casting techniques. Make sure the mix is right for the specific casting, forming and finishing methods you plan to use. ...
- Consider your performance requirements. ...
- Mix up a trial batch first. ...
- Check the yield. ...
- Be ready to relinquish some control. ...
- Don't be afraid to experiment a bit. ...
- Know what you're doing. ...
How do I make this large mold for concrete countertop?
- Lightly mist the bottom of the form with spray adhesive. ...
- Be careful and don’t create puddles of adhesive on the mold. ...
- Sprinkle the decorative aggregateon the surface, and use a little bit more than you think you’ll need because some of it will be lost during casting. ...

How thin can you make concrete countertops?
Mark Rogero, principal of Concreteworks, explains that of late there's been “a major shift in reinforcement technology—we use fiberglass reinforcement in surface concrete that has made it stronger, thinner, and more refined than the steel-reinforced concrete of the past.” Now concrete counters can be as thin as three- ...
What is the minimum thickness for concrete counter top?
1 1/4”HOW THICK ARE CONCRETE COUNTER- TOPS? Standard thickness is 1 1/2” with a minimum of 1 1/4” and maximum of 3”. Any thickness beyond 3” can be achieved using techniques to give the appear- ance of the desired thickness, yet still maintain weight and size within desirable limits.
What forms to use for concrete countertops?
Most precast countertop professionals use melamine for concrete forms. Melamine-coated particle board is ideal for GFRC, you don't even need to use release agent. Simply create melamine boxes and seal the inside corners of your mold with silicone.
How do I make a concrete countertop form?
1:089:07How to Form and Pour DIY CONCRETE COUNTERTOPS in ...YouTubeStart of suggested clipEnd of suggested clipWe're using PVC one by fours to create the forms for the edge of the countertop. We're going toMoreWe're using PVC one by fours to create the forms for the edge of the countertop. We're going to attach these to the sides of the cabinets. So that our countertop will be one and a half inches. Thick.
Do I need rebar in concrete countertop?
Concrete countertops are not supported by a subgrade, as are floors and other slabs. They are like cantilevers and must be reinforced to limit structural cracking and ensure sufficient tensile strength and ductility.
What is the thinnest concrete can be poured?
How Thin Can You Pour Concrete Over Existing Concrete? The thinnest that is usually used when pouring concrete, in general, is about 2 to 2 ½ inches. That also applies to this pouring new concrete over old concrete. Any thinner than 2 inches would be too thin.
Can you DIY concrete countertops?
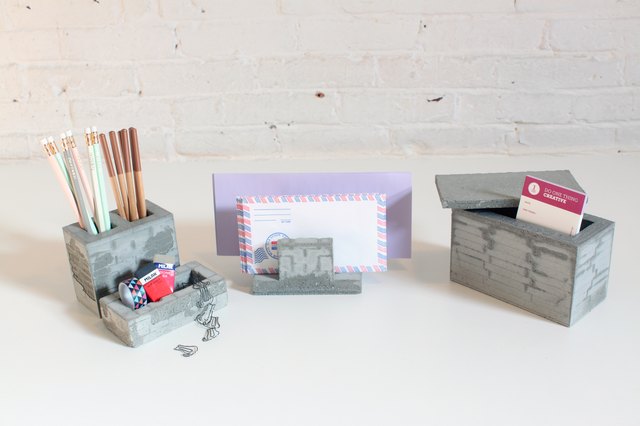
DIY Concrete Countertops. Concrete countertops can give the kitchen inside your home a distinctly industrial look or provide an outdoor kitchen with a slab that is both functional and durable. Making your own DIY concrete countertops may require some dedicated time, but the result of your effort can be gratifying.
Can I use regular concrete for countertops?
1. Don't Use Regular Concrete Mix. When it comes to concrete countertops, not just any mix will work. While traditional concrete mixes are great to have on hand, Quikrete Concrete Countertop Mix is specifically made for this type of project.
How much do DIY concrete countertops cost?
While DIYing a concrete countertop may cost around $8 to $15 per square foot, you will need to pay extra for tools to get the job done.
How do you make a concrete countertop in an hour?
3:5619:43How to make a Concrete Counter Top in 1 hour! - YouTubeYouTubeStart of suggested clipEnd of suggested clipThis is the start of the show right here we're gonna use rapid set mortar mix rapid set is expensiveMoreThis is the start of the show right here we're gonna use rapid set mortar mix rapid set is expensive they can do so you can't get it anywhere else.
How do you make a countertop from scratch?
1:1619:44Building DIY WOOD COUNTERTOPS from PLYWOOD & LAMINATE for ...YouTubeStart of suggested clipEnd of suggested clipI cut a piece of plywood to length using my track saw but a circular saw and straightedge would alsoMoreI cut a piece of plywood to length using my track saw but a circular saw and straightedge would also work here. I.
How do you connect two pieces of concrete countertops?
0:472:45How to Create a Perfect Seam in a Concrete Countertop! - YouTubeYouTubeStart of suggested clipEnd of suggested clipTogether. Real nice. So just using this simple little flashing where they you know seam is is anMoreTogether. Real nice. So just using this simple little flashing where they you know seam is is an incredible. Easy thing to do.
Step 1: Build the Mold
To determine the size of your countertop, measure the base cabinets that the countertop will be sitting upon (Image 1). Add an extra 3/4" for each overhang. Our island countertop will be 3’ x 4’.
Step 2: Make Cutouts
If you need to have a cutout in your countertop for a cooktop or a sink, measure and mark it on the mold's base. When determining the size of the cutout, take into account the thickness of the side pieces of the melamine mold. Do a dry fit of the cooktop or sink to make sure the size is correct.
Step 3: Build Support Frame and Prep Wire
When the outer mold is done, you’ll need to build a support frame to surround it. The concrete you’ll be pouring is heavy — about 10 to 15 pounds per square foot so the extra support is important to prevent the edges of the mold from bending due to the weight of the concrete.
Step 4: Mix and Pour Concrete
For our 12-square-foot countertop, we needed three 60-pound bags of ready-mix concrete. Add water to the concrete and mix with a shovel per the manufacturer's instructions.
Step 5: Remove the Mold
Remove the 2x4 support frame from the sides and ends of the mold. To do this, carefully drill two 2" screws equal distance apart, halfway into each side of the mold. Be careful not to drill all the way through — you don’t want to disturb the mold edge. Remove the screws holding the mold sides to the base.
Step 6: Finish the Slab
When the slab comes out of the mold, it’s going to have imperfections. Use an orbital sander to smooth out the surface and edges. Wear a respirator; this is a dusty process. Start with 100-grit sandpaper. Keep one hand on the top of the sander as you polish the edges. Be prepared to use lots of sandpaper.
Step 7: Install the Countertop
Prepare the installation by running a thick bead of silicone caulk around the upper edge of the cabinet. Bring the countertop in, set it in place and press down gently to seal the caulk.
How long does concrete need to be moist?
I then covered the concrete in plastic to keep the moisture in and the humidity high. Make sure to keep the concrete moist for about 4 days. You don’t need to cure it for any longer than that. Do a bit of reading up on curing if you’re unsure, it’s really interesting stuff.
How long does concrete need to dry before sealing?
I let the concrete dry for the next 4 days. Before sealing you need it to be properly dry and to test this you place a piece of rubber on top. If there is a wet spot underneath after 2 hours, it needs to dry for longer.
How To Build A Concrete Countertop?
Hi, I’m Jeff Girard. I built my first concrete countertop in 1999. Back then, I didn’t have a guide to follow, or have beautiful step by step DIY concrete countertop instructions like you have here.
Precast Concrete vs Microtopping
The technique that I used back then, and that I will explain on the remainder of this page, is precast concrete countertops. This is a traditional, basic way to make concrete. The overall process is:
Free Guide: How to Make Precast DIY Concrete Countertops
The aim of the following Precast DIY concrete countertop guide is to provide you with a solid foundation in concrete countertops, and to help you navigate through the most common problems you may face along the way.
Safety & Tools
In this chapter we will cover basic safety guidelines and tools you need to create your very own concrete countertop.
Setting Up Your Workspace
Chapter 2 is all about setting up your workspace environment to make your precast concrete countertop.
Templating
In this chapter we will learn how to build your concrete countertop template.
Forming
Forming is the process of making the actual mold to pour the concrete into. Making sure your form, follows the exact dimensions of your template is very important!