How do you make a styrofoam airplane?
- Fold the paper in half vertically.
- Unfold the paper and fold each of the top corners into the center line.
- Fold the top edges into the center line.
- Fold the plane in half toward you.
- Fold the wings down, matching the top edges up with the bottom edge of the body.
- Add double stick tape to the inside of the body.

How do you cut a styrofoam plane?
Cut a slit in the body of the plane near the middle for the wings. Slide the wing piece and the tail piece onto the appropriate places (it's a bit hard because the styrofoam is thick, but it will squeeze...
How do I attach the wings and tail to the styrofoam?
Slide the wing piece and the tail piece onto the appropriate places (it's a bit hard because the styrofoam is thick, but it will squeeze... The tightness is what will hold your project together).
Can you make a flat foam airframe?
If you are like most RC enthusiasts you have spare spare motors, servos & batteries. This instructable shows you how to make a flat foam airframe in a couple hours.
Can you paint on styrofoam with paper templates?
Eric colored the paper templates and then glued them on to the Styrofoam templates (a very thin coat). We only did the top of the wings and tail that way, but both (2 paper templates) sides of the airplane body. It works and don't have to mess around with the acrylic paints, etc.

How do you make a styrofoam plate airplane?
2:3213:59How to Build a Planes out of Foam Plates - YouTubeYouTubeStart of suggested clipEnd of suggested clipThis doesn't need to be perfectly round it just makes it look a tiny bit nicer. Just like that andMoreThis doesn't need to be perfectly round it just makes it look a tiny bit nicer. Just like that and now I'm going to cut this piece off already.
How do you make a styrofoam glider?
0:128:44How to make a foam free flight glider | Cheap and fast glider build - YouTubeYouTubeStart of suggested clipEnd of suggested clipSo let's do another glider using foam board this material is very easy to find and very cheap. ForMoreSo let's do another glider using foam board this material is very easy to find and very cheap. For that we are going to use very basic tools and a sheet of foamboard a3. Size.
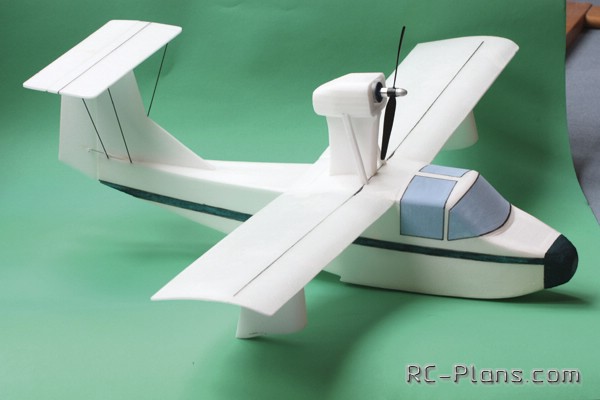
What are foam planes made of?
Most modern foam airplanes use EPO foam, which is more dense and "oily" than EPS foam, which is lighter but less resistant to damage. There are also different grades of EPO foam, each with different properties. Sometimes a single aircraft will use two or even three grades of foam.
How do you make a rubber band Styrofoam airplane?
12:1215:25How to make a DIY rubber band plane - YouTubeYouTubeStart of suggested clipEnd of suggested clipIt's very light and therefore it's tilting because of the weight from the hot glue. So I've takenMoreIt's very light and therefore it's tilting because of the weight from the hot glue. So I've taken these two little triangular pieces of styrofoam.
How do you make a toy glider airplane?
0:157:31How to make an airplane with cardboard (glider) - YouTubeYouTubeStart of suggested clipEnd of suggested clipWe have to bend the cardboard gently to make the shape of the wing. The wing have a slight curveMoreWe have to bend the cardboard gently to make the shape of the wing. The wing have a slight curve from the top and almost flat at the bottom that shape is what makes the ribbon fly.
How do you make a glider plane?
4:3414:57Dart and Glider Paper Airplane Flies Over 100 Feet! Learn How to Make ...YouTubeStart of suggested clipEnd of suggested clipNow i'm going to use my hand and insert it into this whole pocket under these flaps. And i can thenMoreNow i'm going to use my hand and insert it into this whole pocket under these flaps. And i can then begin to pinch these sides. And slowly collapse the paper into this shape.
What kind of foam is used for model airplanes?
Foam rc airplanes are, generally speaking, very durable. Different types of foam can be used in the manufacture of planes, with different foams used for different applications. The main foams used are Expanded Polystyrene (EPS), Expanded Polypropylene (EPP), Expanded Polyolefin (EPO) and Depron.
How are model airplanes made?
Flying models can be assembled from kits, built from plans, or made completely from scratch. A kit contains the necessary raw material, typically die- or laser-cut wood parts, some moulded parts, plans, assembly instructions and may have been flight tested.
What is the best material to make a rc plane?
The standard in model airplane-building since the late 1920s, balsa wood combines the two elements necessary to a successful flight: strength and lightness. Balsa wood is also easy to cut and carve with just a good, sharp hobby knife or razor saw, so no need for heavy power tools.
How do you make a rubber band glider?
Rubber Band Glider LauncherStep 1: Gather Your Supplies. Tip Question Comment.Step 2: Tie Rubber Band on Marker. Tip Question Comment.Step 3: Cut Out Fishtail Shape. ... Step 4: Glue Them Together. ... Step 5: Glue It on the Glider's Fuselage. ... Step 6: Hook the Rubber Band on the Tab, Pull Back Then Let It Go!
How do you make a wooden glider?
0:1912:44DIY Outdoor Wooden Bench Glider - YouTubeYouTubeStart of suggested clipEnd of suggested clipOnce i was done with my straight stock i next moved to making all the needed curve pieces. For thisMoreOnce i was done with my straight stock i next moved to making all the needed curve pieces. For this i used a set of templates. These are mdf cutouts that i place on top of my board then trace.
How to paint a plane with styrofoam?
Cut a slit in the body of the plane at the back for the tail. Slide the wing piece and the tail piece onto the appropriate places ( it's a bit hard because the styrofoam is thick, but it will squeeze... The tightness is what will hold your project together). Paint the plane the desired color.
What age can you make a Styrofoam airplane?
Styrofoam Airplane. Children Age 2+ will enjoy playing with these (if you are careful to make the wings even on either side, the airplane will really fly). But to MAKE the craft, children should be Age 4+ as it requires a bit of dexterity. You don't have to paint yours pumpkin orange...
Can you paint styrofoam with tempra?
scissors, paint or markers (see NOTE) NOTE : you can't paint styrofoam with tempra paint or wash able markers. It doesn't cover well and it will flake off when it's dry.
What is the only force you can really vary, besides changing the airplane or its design?
The only force you can really vary, besides changing the airplane or its design, is thrust.
Can a plane go into space?
A plane is not physically able to break into outer space. They would need to rapidly accelerate to a speed that would allow them to break go beyond earth's gravitation. Then a plane would need to somehow be provisioned with hardware and instrumentation to maintain an orbit. Right now, a rocket accelerates through 25,000 mph to break free of the gravitational pull. Far too fast for any plane in existance.
Step 1: Airframe Layout
Print out the full scale design available free from http://www.foamyfactory.com/ Put the design on poster board so you can easily trace out the design for future builds. I've found that making just the vertical profile of the fuselage, the whole wing and the tail is all you need. Trace out the designs on the foam board.
Step 2: Cut It Out
Cut out the design using a jig saw. You could also use an Exacto knife but the jig saw is much faster and easier. Cut out the slots where the wing fits and the tail fits as well. We'll cut the servo mounts out later.
Step 3: Making the Wing Control Surfaces
I do limited stunt flying so all I use are ailerons and the elevator. You can make a rudder for more advanced flying but I left it out of this instructable but you can apply the same techniques. The simplest control hinge is made from packing tape. Using the jig saw cut both ailerons at a 30-45 degree angle where the control surface meets the wing.
Step 4: Making the Elevator
Cut out the slots to fit the elevator in the airframe. See photo for locations. Instead of angle cutting the elevator (#2), cut the stationary piece labeled #1 in the photo at the 30-45 degree angle just as in step 3. Slide and glue piece 1 into place. Slide part #2 into place and tape the elevator hinge just as described in step 3.
Step 5: Install Servos
Find your servos and control linkages. The length of the control linkages dictate where the servos should be mounted. Simulate the locations of the control horns then make an outline of the servo on the airframe. Repeat this for the elevator. Cut out the servo locations. Use a hot glue gun to fix the servos to the airframe.
Step 6: Mounting the Motor
Use a table saw to cut out a slot in a block of wood to mount your motor on. Pre-drill the mounting holes in the block. Glue the block to the airframe. Mount the motor to the block. I recommend using a folding prop so you can belly land the plane and you won't need landing gear.
Step 7: Mounting the Rest of the Electronics
You now need to mount the ESC, Radio, and Battery. I just use tape to mount the electronics. Use the battery to balance the plane. Make sure the plane balances about 1/3 to 1/2 the wing cord length back from the leading edge of the wing. The further back the more unstable the plane becomes. Its also easier to do 3D aerobatics.
What is a servo motor?
Although servos and brushless motors are both types of RC motors, they are drastically different. Servos are meant for moving a surface, such as the ailerons or elevator. Inside the servo is a little DC motor that is controlled by the receiver. The DC motor is geared so that when it turns, the speed is lowered by a huge percent but the torque is increased. A servo arm gets attached to the gears and can move has a 180˚ rotation. They cannot spin all the way around though, they come to a stop.
What is RC receiver?
The RC receiver is what picks up the signal sent from the transmitter and converts the signal into commands via PWM (pulse width modulation) for servos and ESCs (electronic speed controller). Oftentimes the more expensive receivers are equipped with gyros for flight stabilization, and even GPSs!
How to score foamboard?
1. After you are done scoring the foamboard, break the foamboard on all the lines. This adds bends to the board. See picture 1. You should be left with four panels that are 1 13/15" wide and three smaller strips that are 3/16" wide.#N#2. It's time for those little 3/16" strips to go! You should be able to push them out with your thumb. See the video if you need help. When you are done peeling out the strips, your piece of foamboard should look identical to the one in pic 4.
What does ESC mean on a motor?
The ESC (electronic speed controller ) does three main things. First, it converts the 7.4v ~ 11.1v of the battery to a safe 5v for the receiver to run on. This capability is not offered on all ESCs. You can know that it will lower the voltage to 5v if it has BEC or UBEC printed on the side. This stands for Battery Elimination Circuit and Universal Battery Elimination Circuit. Second, the ESC controls the motor based off of a PWM signal sent from the receiver. Third, it converts the the battery's direct current (DC) into alternating current (AC) that is required by the brushless motor.
How to make a sandbox?
1. Begin with a full sheet of foamboard that should be 30" long. Make markings that are parallel with the length of the board at these: 1 13/16"-- 2"-- 3 13/16"-- 4"-- 5 13/16"-- 6"-- 7 13/16". Refer to Exhibit 1 & pictures 2A, 2B. (no clue why I used the word exhibit when I drew these plans :D) Repeat on the other side of the foamboard.#N#2. Draw lines running parallel to the length of the board (30") across all the little markings you made. When you are done it should look like the blue section "Fuselage" in picture 4.#N#3. Cutting time! Now make sure you watch the video in step 13 on the different cuts before you get to hackin away! On all the lines you drew except for the last one (the line that was 7 13/16" in) will be cut through the first layer paper and foam, just leaving the last piece of paper uncut. In the video I call it a 90% cut.#N#On the 7 13/16" line just cut that all the way through. Try to use a ruler as a cutting guide so that the line is as perfectly straight as possible. Do not try to cut it without a guide.
How far does a 9x5 propeller travel?
So for a 9x5 propeller, under perfect conditions, for every revolution, will travel 5 inches forward s. The propellers never come with the correct hole, so you will have to drill it out.
How long is a 9x5 propeller?
On my plane I used 9x5 propellers. The first number is the length of the propeller in inches, so a 9x5 propeller is 9 inches long.
