How to Nail String Art
- Step 1: Supplies You will need a wood panel 20inches by 30inches long about 1/2inch thick, over a hundred small nails with wide heads, and at least 500 feet of string. ...
- Step 2: Image Decide what type of image you are going to do. ...
- Step 3: Trace Outline ...
- Step 4: Nail Outline ...
- Step 5: Start the Pattern ...
- Step 6: Repeat Step 5 Until Full ...
Full Answer
What size nails are used for string art?
Nails for string art are typically silver, have a head diameter of 0.05 to 0.1″ and are 0.5 to 1″ long, depending on the intricacy and design of the project. Making good string art takes time, patience, and knowledge of what tools to use so your masterpiece won’t fall apart.
What can you do with only nails and string?
With only nails and string, you can transform a few shapes or letters into art in whatever colors and sizes you wish! Making string art can also be a fun family project. Above is the string art project that we made with our daughter for her room.
What materials do you need to make string art?
To make the DREAM string art shown in the first photo, we used a 1.5 cm (5/8″) thick particle board with a white melamine coating. It is 55 cm (21 1/2″) wide and 45 cm (17 1/2″) long. Do: Use wood – solid, plywood or particle board, because it offers a hard surface on which to secure the nails in place.
How do you nail string art to wood?
Use wire nails or linoleum nails as they have a nice nail head with enough space to keep the string from slipping off and are the perfect size on the wood board. You can find these at your local craft store or hardware store. Then simply hammer around the outline! Pound nails into the wood piece along the string art design.

What nails are needed for string art?
So what are the best nails for string art? The best nails to use for string art are sturdy hardware or crafting nails with a round, flat head and smooth shank. Nails for string art are typically silver, have a head diameter of 0.05 to 0.1″ and are 0.5 to 1″ long, depending on the intricacy and design of the project.
What is needed for string art?
What You'll NeedPiece of wood (stained or unfinished)Linoleum nails (how many you need depends on the size of your project; one pack was enough for this project)Embroidery floss.Tape.Image for outlining.
How do you do string art nails?
3:165:02DIY String Art Tutorial – How to Make String Art | Hobby Lobby® - YouTubeYouTubeStart of suggested clipEnd of suggested clipYou'll want to add a border of nails all the way around the edge of your wood to and outline it withMoreYou'll want to add a border of nails all the way around the edge of your wood to and outline it with string as well. With all the nails in place you can remove the template.
What kind of string is best for string art?
Embroidery floss is a good choice for delicate string art pieces, whereas yarn and thicker threads are better suited for statement pieces. You need to make sure that you are using strong, durable thread, no matter how thick or thin it is. The wrong thread will only end up breaking and ruining your whole project!
How do you start and end string art?
3:286:11How to make string art | Tutorial - YouTubeYouTubeStart of suggested clipEnd of suggested clipThe way I started off is by just tying a simple nuts and the end of the string. And then loopingMoreThe way I started off is by just tying a simple nuts and the end of the string. And then looping that around one of the nails as a starting point. And I left the tail in place because that's what I'm
What is art with string called?
What is string art? Also known as thread art, the origins of string art go back to the 19th century, when Englishwoman Mary Everest Boole used a form of string art called “curve stitching” to help teach children mathematics.
Can you do string art on canvas?
String art is a cute and simple way to create a piece of art that doesn't require much artistic talent. Typically, string art involves wood, nails, and a hammer, but with this simple string art DIY project, no hammer is necessary because the string art is done on canvas.
How do you make a string portrait?
0:473:17Making Hyperrealistic Portraits With A Single Thread | Master CraftYouTubeStart of suggested clipEnd of suggested clipTakes a digital version of the image. And changes it to grayscale. Then he'll adjust the brightnessMoreTakes a digital version of the image. And changes it to grayscale. Then he'll adjust the brightness and contrast. So that the image has manageable highlights and shadows. The key is in the shadows.
What kind of wood do you use for string art?
Wood Board Type: You can use solid wood, plywood or particle board. The most important thing is choosing a wood that is thick enough to hold the nails securely without having the nails come through the back of the wood panel. Make sure it it at least 1/2 to 3/4 inch thick.
Can you do string art on canvas?
String art is a cute and simple way to create a piece of art that doesn't require much artistic talent. Typically, string art involves wood, nails, and a hammer, but with this simple string art DIY project, no hammer is necessary because the string art is done on canvas.
How do you write an algorithm for string art?
2:2514:27I Wrote an Algorithm to Draw Portraits from Thread | Thread Art - YouTubeYouTubeStart of suggested clipEnd of suggested clipSo how do you actually determine which is the best nail well initially we pick a random nail toMoreSo how do you actually determine which is the best nail well initially we pick a random nail to start with and from the current nail we draw a line to every other nail on the board.
How do you do yarn art?
2:5111:43DIY YARN ART | Make Your Own Fun Mini Canvases with Yarn or StringYouTubeStart of suggested clipEnd of suggested clipFirst making note of the yarn colors that you have available. You'll want to paint using colorsMoreFirst making note of the yarn colors that you have available. You'll want to paint using colors similar to the yarn colors you'll be adding on top. As. You can see I painted the white sections. White.
Can you use a tweezer to remove paper nails?
As you can see, I kept tearing the paper up in the regions in was done nailing. Sometimes small bits of paper will remain attached to the nails. You can use a pair of tweezers to remove them.
Do you have to pull a string to pull off a nail?
You have to make sure your string is taught so that it doesn't slip over the nail and come off. But you don't even have to pull so hard as to tug on the nails themselves.
How far apart should I put nails?
Don’t: I definitely do not recommend placing nails as close together as we did, i.e. 5 mm (3/16″) apart. I’d say an interval of around 1.5 cm (1/2″) between the nails would be a lot more practical. Trying to hammer them in so close together, we sacrificed a good number of the nails.
How many nails did we use for the dream letter?
We needed to put the nails rather close together in order for the thin pointy tips and rounded ends of these letters to show. We placed them 5 mm (3/16″) apart, and that meant we used approximately 800 nails! Hammering in nails in a straight line is a challenge, but doing so that close together made the task painstakingly tedious.
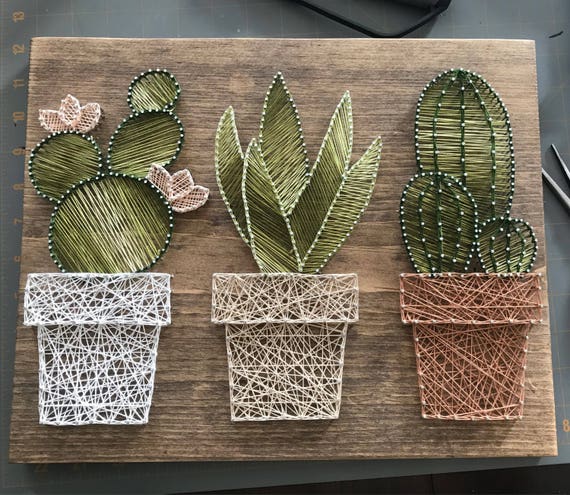
What is string art?
String art is a great way to create decorative wall hangings. With only nails and string, you can transform a few shapes or letters into art in whatever colors and sizes you wish! Making string art can also be a fun family project. Above is the string art project that we made with our daughter for her room. She is very happy with it ...
How thick is dream string art?
To make the DREAM string art shown in the first photo, we used a 1.5 cm (5/8″) thick particle board with a white melamine coating. It is 55 cm (21 1/2″) wide and 45 cm (17 1/2″) long.
What font should I use for a nail?
If you are using letters, simpler fonts with an even thickness and fewer protruding points, such as Arial, would be good. Also, to make it easier to hammer the nails, you may want to space out the letters more than we did (we only had 5 mm (3/16″) between the A and the M, for example).
How to make craft
First choose the shape that you want to create. Have in mind that you can create any shape that you want. I’ve decided to create a star and trace or draw it on piece of paper. Then cut out the star with scissors.
Craft Video
Need more string art inspiration? Here is a pinterest board full of string nail craft ideas to help your girls create a amazing string art craft.
Step 1: Supplies
You will need a wood panel 20inches by 30inches long about 1/2inch thick, over a hundred small nails with wide heads, and at least 500 feet of string. The tools you will need is a hammer and a pencil.
Step 2: Image
Decide what type of image you are going to do. For example, maybe a bear or an elephant.
Step 3: Trace Outline
Now that you have an image picked out. Trace the image’s outline with the pencil lightly on to the wood panel, make sure to center it.
Step 4: Nail Outline
Now that you have the image’s outline traced out, you will now take the hammer and nails and nail the nail 1/3 of the way in and follow the trace image line and put a nail every half inch of each other, until the traced image is outlined with nails completely.
Step 5: Start the Pattern
Now you will take the string and pick a nail (doesn’t matter what nail, it’s a random pattern so go crazy) and make three knots around the nail.
Step 6: Repeat Step 5 Until Full
Now this part is where you take it and make it how you want because it is art. From the first nail you will bring the string across and put three loops on the second nail and then go to another nail across from that nail and put three loops on that nail and repeat the process until you feel the product is complete and full.
How to make string art?
Once you have outlined the shape with string, begin filling it in by crisscrossing and wrapping from nail to nail. There is no rhyme or reason to this process. Simply go from side to side; top to bottom and corner to corner, varying the lengths and order randomly. If you see that you're about to run out of string, try to end where you left a tail of string at the beginning. Knot the ends tightly and start another bundle of floss there as well. Repeat this process until the shape is filled into your liking, then tie off the end when finished. Clip the tails of thread. Now that you've finished, you can display your creation wherever you want in your home! You can also start a new string art project while you're at it.
When was string art popular?
String art has been around for a while; it was popular in the 70s, but it is enjoying a comeback as a simple and fun way to make your own artwork. This retro craft requires very few materials and is an inexpensive way to add some personality to your walls.
How to tie off embroidery floss?
Begin by tying the floss to the first nail, and leave a tail for tying off when you are finished. Make sure to use all six threads of the embroidery floss. Using fewer will cause the strings to break when you pull it taut against the nails. The Spruce / Valerie Ott.
How to prevent fingers from getting hit by hammer?
To prevent your fingers from getting hit with the hammer, pinch each nail in a clothespin and hold that instead of the nail itself.
Can you use more than one color of embroidery floss?
You could use more than one color of embroidery floss to fill in the shape, or choose a variegated string.
Can you make nail art with string?
You'll then have a nice outline / pattern for your string art project. Keep in mind that nail and string art can be made with just about any design. Make it personal to you!
Do you need an outline for string art?
You will need an outline for your string art.