
- Read the circuit diagram on the relay to know what prongs to connect power and the multimeter to. ...
- Set your multimeter to the ohm setting. Look for the setting on your multimeter that has the ohm symbol (Ω) to use for testing your relay.
- Attach jumper wires to the terminals on your vehicle’s battery. Jumper wires are smaller cables with alligator clips on both ends so you can easily transfer a current.
- Connect the jumper wires to the positive and negative relay terminals. Flip the relay over so the prongs point straight up so you can connect the jumper wires.
- Listen for a clicking sound when you attach power to know if the relay still works. ...
- Hold the multimeter probes against the other 2 prongs on the relay. ...
- Check the multimeter for a 0 reading to know the relay still functions. ...
How to test a fuse the easy way with multimeter?
Part 2 Part 2 of 2: Testing the Fuse
- Turn the equipment off and remove the fuse. Make sure the device, equipment, or vehicle is turned off before the fuse is removed.
- Turn the meter on and set it to measure continuity. ...
- Put one lead on each end of the fuse and look at the display. ...
- Test the fuse. Listen for the multimeter to beep continuously as you hold the probes against the fuse.
How to test a starter relay?
Ⅵ How to Test a Starter Relay?
- Make sure the car is parked safely and that the transmission is in neutral or park. ...
- Get a fully charged battery and a portable jumper cord before conducting the test. ...
- Examine the terminals on the battery and the starter. ...
- The cables from the starter solenoid to the starter relay should be followed. ...
How to test a four terminal relay?
Steps Download Article
- Find and remove the relay. The relay should not be tested while it is connected to the circuit. ...
- Find the relay characteristics. The relay will have 4 pins; 2 will connect to the control circuit and 2 will connect to the high power load.
- Confirm the integrity of the relay load connections. ...
- Apply power from a test power supply to the control circuit. ...
How do I test an outlet with a multimeter?
Method 1 Method 1 of 2: Checking the Voltage of an Outlet’s Sockets
- Read the instructions that came with your multimeter before you use it. ...
- Turn on the multimeter and switch the dial to the AC setting. ...
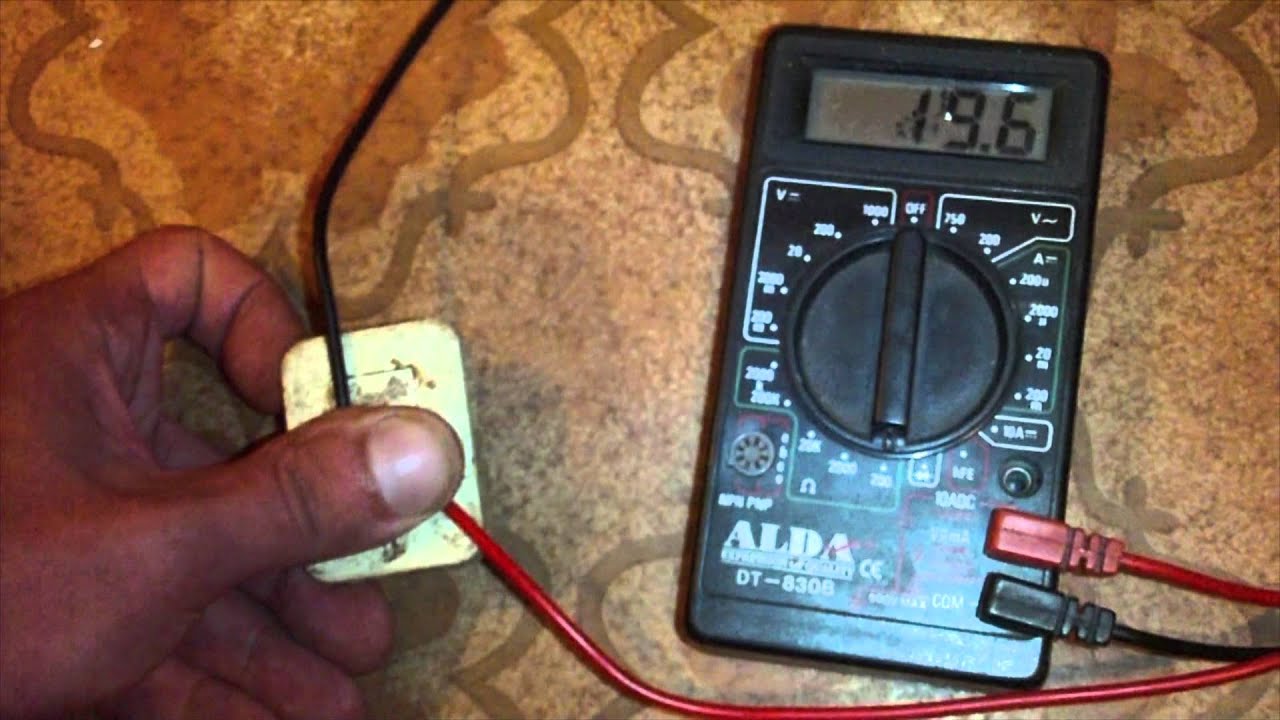
- Insert 1 prong into the left side and 1 into the right side of the outlet. The multimeter should have 2 prongs, one red and one black.
- Check the reading on the multimeter to determine the outlet’s voltage. ...
How do you check if a relay is bad?
The only tool required to check a relay is a multimeter. With the relay removed from the fuse box, the multimeter set to measure DC voltage and the switch in the cab activated, first check to see if there are 12 volts at the 85 position in the fuse box where the relay plugs in (or wherever the relay is located).
What is the proper way to test a relay?
4:596:53How to Test a Relay the Correct Way - YouTubeYouTubeStart of suggested clipEnd of suggested clipBetween 30 and 87. All right so we get one connector here connected to the other one. Okay so ifMoreBetween 30 and 87. All right so we get one connector here connected to the other one. Okay so if this is a good relay. This needs to go to to zero or point zero zero one or something like that right.
How do you check continuity on a relay with a multimeter?
7:0913:01How To Test a Relay The Easy Way - YouTubeYouTubeStart of suggested clipEnd of suggested clipSo I'm gonna set my digital multimeter. Over the continuity. Or you can set it on ohms either way.MoreSo I'm gonna set my digital multimeter. Over the continuity. Or you can set it on ohms either way. And I'm gonna take one lead of the multimeter to pin 30. And the other one to pin 87. Okay so that's
How do you test a relay circuit?
2:0712:36How to test a relay and the relay circuit - YouTubeYouTubeStart of suggested clipEnd of suggested clipSo directly across from it. I should have a good ground which comes from the fan. So let me switchMoreSo directly across from it. I should have a good ground which comes from the fan. So let me switch my test light clip over to battery positive. And I should have a good ground on that clip.
How do I test an automotive relay?
0:002:52How to Test Car Relays - YouTubeYouTubeStart of suggested clipEnd of suggested clipTo test the car relay you will need a multimeter.MoreTo test the car relay you will need a multimeter.
What does a clicking relay mean?
Because the clicking indicates that the relay is working, you'll want to focus on the portion of the circuit between the relay and the starter. On the other hand, if you've got power to the solenoid, but the vehicle won't start, you may have either a bad starter or an engine mechanical problem.
What is the resistance of a 12v relay?
between 50 ohms and 200 ohmsThe relays are usually supplied with 12 V directly from the vehicle battery. The electrical resistance (impedance) of the coil is vary and is different depending upon the manufacturer of the relay as well as relay's type, but in general a typical value should be expected between 50 ohms and 200 ohms.
Should a relay coil have continuity?
If the multimeter beeps (or show any sign of continuity), the coil is electrically closed (good). If the multimeter does not beep, the coil is open & damaged.
How do you test a 12v relay with a multimeter?
Grab a multimeter and set it to Ohms. Touch the leads across the electromagnet coil pins and measure resistance. Anywhere from 50-120 ohms is OK. Out of range or open means a bad electromagnet coil winding and time for a new relay.
How do you test a 3 pin relay with a multimeter?
2:3614:10How to Test a 3, 4 or 5 Pin Relay - With or Without a Diagram - YouTubeYouTubeStart of suggested clipEnd of suggested clipNow if you get a reading that's below 50 or above 120 ohms just go ahead and toss the relay there'sMoreNow if you get a reading that's below 50 or above 120 ohms just go ahead and toss the relay there's no point in going on any further it's not a good relay.
How do you jump a relay?
1:382:56HOW TO Bypass A Relay Using One Wire!!! - YouTubeYouTubeStart of suggested clipEnd of suggested clipSay the multimeter shows battery voltage at 12.45 volts that's all that little jumper is doing isMoreSay the multimeter shows battery voltage at 12.45 volts that's all that little jumper is doing is jumping from the 87 terminal to the 30 terminal on the relay.
Why relay testing is required?
Why is protection relay testing important? Due to the critical nature of protection relays, testing during the commissioning stage is crucial for confidence in the operational safety of an electrical system. Additionally, testing on a regular basis is necessary to ensure correct operation is maintained.
How do you test an 8 pin relay with a multimeter?
6:258:08How To Test a Relay (and How Relays Work) - in 8 minutesYouTubeStart of suggested clipEnd of suggested clipBetween pins 30 and 87 closes when the relay is at rest there should be no continuity between pinsMoreBetween pins 30 and 87 closes when the relay is at rest there should be no continuity between pins 30 and 87 because the switch is open let's energize the coil.
How do you test a 5 prong relay?
9:4514:10How to Test a 3, 4 or 5 Pin Relay - With or Without a Diagram - YouTubeYouTubeStart of suggested clipEnd of suggested clipAnd then you just touch random pins and unless you get a reading of between 50 to 120. There. We goMoreAnd then you just touch random pins and unless you get a reading of between 50 to 120. There. We go we got a 112 ohms.
Why relay testing is required?
Why is protection relay testing important? Due to the critical nature of protection relays, testing during the commissioning stage is crucial for confidence in the operational safety of an electrical system. Additionally, testing on a regular basis is necessary to ensure correct operation is maintained.
What is the resistance of a 12v relay?
between 50 ohms and 200 ohmsThe relays are usually supplied with 12 V directly from the vehicle battery. The electrical resistance (impedance) of the coil is vary and is different depending upon the manufacturer of the relay as well as relay's type, but in general a typical value should be expected between 50 ohms and 200 ohms.
What to know before testing a relay?
Before testing a relay, you must understand how it works behind the scenes. For example, if you remove the relay from the fuse box, you’ll notice that it has a weird-looking diagram along with some numbers.
How many ohms should a relay have?
Unfortunately, there’s no definitive answer to this question since this is up to the manufacturer. However, on average, your relay should have about 50 to 200 ohms. For accurate information, refer to your owner’s manual.
What does it mean when a relay beeps?
Your multimeter should now beep, indicating that the relay has continuity and that it’s still in great shape.
What are the pins in a relay?
Those numbers or pins control different things in your relay. For example, a 4-pin relay uses pin 85, 86, 30, and 87. Notice that they are spawned across the relay for the sake of convenience.
How to know if a fuse is working?
Once you’ve set the device to continuity, put the leads on both ends of the fuse. If you’re getting continuity, the multimeter will make some noise. That way, you’ll know for sure that the fuse is working.
What pins to check for resistance?
After checking for resistance on pins 30 and 87 , we have to energize the relay itself to see if the coil kicks in. As we said at the beginning, we’re just bench testing the relay. So, to verify that it works, we have to power the unit.
What does it mean when a fuse looks split in half?
If the inside of the fuse looks split in half, you got a blown fuse. Otherwise, use a multimeter to check the fuse.
How to test a relay with a multimeter?
Hold the multimeter probes against the other 2 prongs on the relay. Plug the multimeter probes into the ports on the bottom of the machine so you can use them for testing. Hold either of the probes against one of the prongs labeled with 30 or 87. Then press the second probe against the last prong on the relay. The multimeter will measure the resistance of the internal circuit between the prongs.
How to check if a relay is connected to a multimeter?
Read the circuit diagram on the relay to know what prongs to connect power and the multimeter to. Look on the main body of your relay for a printed diagram of the circuit it controls. Look for the 2 points on the diagram that have a box in between them to know which prongs control the power. The 2 points that have a break in the line connecting them are the prongs that you’ll need to test. Look at the numbers printed next to the prongs to determine which point corresponds with them.
How to test relay ohms?
Set your multimeter to the ohm setting. Look for the setting on your multimeter that has the ohm symbol (Ω) to use for testing your relay. If your multimeter only has 1 ohm setting, then turn the dial so the arrow points at that setting. If the multimeter has multiple ranges within the ohm setting, choose the lowest range possible to get the most accurate reading.
How to test fuel pump relay?
Start by taking the fuel pump relay out of your vehicle so you can clean and inspect it. After that, you can use a multimeter to check the resistance going through the relay’s circuit to see if it’s faulty or not. Steps.
What does the ohm setting on a multimeter measure?
The ohm setting on your multimeter measures the resistance between the terminals on the relay to check if they’re working properly.
How to tell if a relay is faulty?
Look at the readout on the multimeter’s screen to see if it reads 0, meaning the circuit has no resistance between the points. If the reading is greater than 0, then the circuit inside the relay is faulty.
How to connect jumper wires to a relay?
Connect the jumper wires to the positive and negative relay terminals. Flip the relay over so the prongs point straight up so you can connect the jumper wires. Clip the wire leading from the negative terminal on your battery to the terminal labeled with an 85. Attach the wire connected to the positive battery terminal to the pin labeled with an 86.
