Orienting lines (also called meridian or orienteering lines) The compass housing contains a liquid filled capsule that holds magnetic compass needle. It will have bearing markings around the bezel (azimuth rim) of the compass housing, that indicate the cardinal directions (NESW), and smaller interval bearings between them.
How do you orientate a compass?
Orienting lines fixed within the compass housing and designed to be aligned with the vertical grid lines on a map. Half the lines are coloured red to indicate north. 5. Orienting arrow fixed within the compass housing, aligned to north on the housing. 6.
What are the different parts of an orienteering compass?
The needle in an orienteering compass is made up of different parts. Each part of the compass has its own purpose and is useful when calculating distance. The arrow points in the direction of travel. To use an orienteering compass, you should take a bearing, which is a long-range direction.
How does a compass work?
The compass needle floats on liquid so it can rotate freely, the red end should always point to magnetic north. 4. Orienting lines fixed within the compass housing and designed to be aligned with the vertical grid lines on a map.
What direction does the arrow point in an orienteering compass?
The arrow points in the direction of travel. To use an orienteering compass, you should take a bearing, which is a long-range direction. The arrow in a compass point in the direction of travel, so you don’t need to take other bearings.

Where is the orienting arrow on a compass?
Twist your compass dial so that the orienting arrow lines up with the red end of the magnetic needle. The direction of travel arrow should line up with your 'bearing' (this is the angle you want to walk in) – now you can begin your walk by following this arrow.
Why are there two lines on a compass?
Orienting Lines These lines run parallel to and rotate with the orienting arrow. They aid in navigation, especially when the compass is sitting on a map.
How do you use compass orientation?
4:107:16How to Use a Compass || REI - YouTubeYouTubeStart of suggested clipEnd of suggested clipOnce the compass is in position rotate the bezel until the orienting lines are lined up with northMoreOnce the compass is in position rotate the bezel until the orienting lines are lined up with north and south on the map.
What are the lines on a compass called?
Orienteering Lines - A series of parallel lines located on floor of compass dial. These lines are used when aligning a compass to a map.
What is the name of the line with which a compass aligns?
The magnetic compass is the most familiar compass type. It functions as a pointer to "magnetic north", the local magnetic meridian, because the magnetized needle at its heart aligns itself with the horizontal component of the Earth's magnetic field.
What does orientation mean on a map?
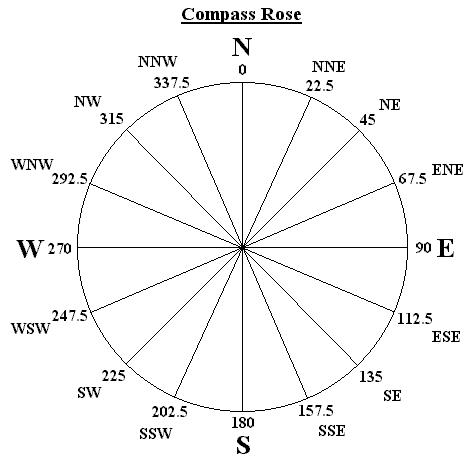
ORIENTATION: a map should indicate which way is north (and/or south, east and west). Commonly this is done by a north arrow or compass rose. Orientation may also be shown by graticule or grid marks (e.g. lines of latitude and longitude).
Why is orientation important on a map?
One of the last things we need to understand in order to read a map is its orientation, or its relationship to the compass directions of North, East, South, and West. That's pretty important. If the map says that a location is straight ahead of you, that's only correct if you're facing the right direction.
How do you orient?
3. Orient Your MapPlace your compass on the map with the direction of travel arrow pointing toward the top of the map.Rotate the bezel so that N (north) is lined up with the direction of travel arrow.Slide the baseplate until one of its straight edges aligns with either the left or right edge of your map.More items...
What does the O stand for on a compass?
Re: 'O' instead of 'W' in compass This is actually the French letter for west (we say "ouest"), but I didn't realize that I made it in French.
What does the Flinders bar on a magnetic compass corrects?
The Flinders bar is used to counteract the vertical magnetism inherent within a ship and is usually calibrated as part of the process known as swinging the compass, where deviations caused by this inherent magnetism are negated by the use of horizontal (or quadrantal) correctors.
How do you read a compass degree and minutes?
Degrees, minutes and seconds are denoted by the symbols °, ', ". e.g. 10° 33' 19" means an angle of 10 degrees, 33 minutes and 19 seconds . A degree is divided into 60 minutes (of arc), and each minute is divided into 60 seconds (of arc).
Which way is north on a compass?
To find north, pick up the compass and hold it level with the dial on top. The red end of the magnetic needle will point north. Ignore all the other markings on the compass except the direction that the red half of the needle points to.
What are the parts of an orienteering compass?
As figure 1 shows an orienteering compass typically consists of three main parts: a magnetic needle, a revolving compass housing, and a transparent base plate. The magnetic needles north end is painted red and its south end white.
What is a compass used for?
It’s probably time to change that, isn’t it? Essentially a compass is nothing more than a magnetized needle, floating in a liquid, and responding to the Earth’s magnetic field consequently revealing directions. Over time compass markers have added features which make compasses work more harmoniously with maps and also more beneficially as stand alone tools. Today, compasses can be classified as one of four types, namely: fixed-dial (the type that you find on a key chain, or that come out of a gum ball machine), floating dial (the needle is an integrated part of the degree dial), cruiser (professional grade instrument used by foresters), and orienteering. For hiking, mountaineering, back country skiing , canoeing, hunting or the like, the orienteering type is the most sensible being accurate to within 2 degrees, not requiring a separate protractor nor map orientation, and being highly affordable. Hence forth, this article focuses solely on the orienteering compass.
How to calculate bearings?
Bearings can also be calculated from a topographic map, and then used in the field. Assume you know you are at landmark A in the field, and you want to travel to landmark B, but you can’t see it. If you have a topographic map and you can identify both landmarks on the map, you can use you compass with the map to get a bearing thus enabling you to travel accurately to landmark B. On the map align either the left or the right edge of the base plate through landmarks A and B with the direction of travel arrow pointing toward B. If the base plate edge isn’t long enough to reach both landmarks simply extend it with any straight edge (for example a piece of paper), or draw a straight line between the points and align the compass edge with the line. Without moving the base plate turn the compass housing until the orienteering arrow points to the top of the map (remember that north is at the top of the map). If you are lucky enough to have one of the maps north/south grid lines visible under the compass housing you can align the meridian lines on you compass with the maps north/south grid line as you turn the housing until the orienteering arrow points to the top of the map. Now, read the bearing at the compasses index line, and follow the bearing in the field! See Figure 4. A word of caution, map bearings and field bearings can differ in the USA by as much as 30 degrees east and 20 degrees west. This difference and how to deal with it is explained in the next section below on declination. Figure 4, has a map with magnetic north lines, rather than true meridian lines, and so declination is not a factor.
How to get around obstacles?
If you can’t see a landmark along your course, there are a couple of other methods you can use to get around the obstacle and get back on your original course. One method is to have a member of your party navigate the obstacle, and then treat him like a landmark. One he has cleared the obstacle talk him into position along your original bearing. Also have him take a back bearing on you to confirm he is in indeed back on course. He can do this by pointing the direction of travel arrow of his compass at himself and then turning his body so as to align the red end of the magnetic needle over the orienteering arrow, and he should notice that you are along the bearing, if not he needs to move left or right. If the obstacle is too large for the previously described method, or you are on a solo trip, you can use right-angles to maneuver the obstacle. To do this turn 90 degrees and walk across the front of the obstacle while counting your steps. To make a 90 degree turn without changing the bearing setting on your compass, simply turn your body until the red end (north end) of the magnetic needle points at the West marking (to turn right) or East (to turn left), as opposed to the normal North marking. Once you’re past the front of the obstacle turn 90 degrees again, by rotating your body until the red end of the magnetic needle is over the orienting arrow, and walk past the obstacle. Once past the obstacle, turn 90 degrees for a third time (by pointing the red end of the magnetic need at the opposite marking or your first 90 degree turn), and walk the same number of steps you counted to get past the front of the obstacle. Once the steps are up, turn your body to align the magnetic needle back over the orienteering arrow (thus turning 90 degrees for a fourth and final time), and you will be back on course. See figure 3.
How to use a compass to follow a bearing?
A bearing is the direction from one spot to another, measured in degrees, from the reference line of north; in other words it’s one of the 360 degrees of the compass rose. To take a bearing hold the compass in front of you with the direction of travel arrow pointing at the object of interest. Hold the compass level and steady, and rotate the housing dial, until the orienting arrow lines up with the red end (north end) of the magnetic needle, all the while keeping the direction of travel arrow pointed at the object. Read the number indicated at the index line, and that is your bearing. Now to follow that bearing to the object, let’s consider an example. Say you want to travel to a large rock outcropping on the horizon, which is currently visible to you, but which may leave your field of vision when you walk into a dip, or when pending clouds come in or the sun sets. Let’s say your bearing on the outcropping measured 315 degrees (or NW). Assuming you still have the direction of travel arrow pointing at the rock outcropping, and have not changed the 315 degree bearing setting on the dial, walk forward keeping the magnetic needle over the orienting arrow (by rotating your body, and not the dial), and the straight line course (as pointed out by the direction of travel arrow), will lead you to the rock outcropping. En route, when the rock outcropping leaves you line of sight pick out an intermediate landmark along the bearing, so you don’t have to constantly look down at your compass. Walk to the intermediate landmark, and repeat with another landmark until you reach your destination. Once you arrive at the rock outcropping, what bearing do you use to return to where you came from? Actually you don’t need any other bearing besides the 315 degrees already set on your compass. To return, just point the direction of travel arrow at you, instead of forward, and then rotate your body until the orienting arrow lines up with the red end (north end) of the magnetic needle, and then walk straight ahead while keeping the magnetic needle over the orienteering arrow (just as you did in going to the rock outcropping). That is the easy way to backtrack, of course you could also calculate your back bearing by subtracting 180 from your forward bearing of 315, and set the 135 degree (SE) difference at the compasses index line and then use the same body rotating method mention earlier, only this time you’d have the direction of travel arrow pointing your way. Try this. Take your compass to an empty parking lot or field and mark a spot. While standing at the spot set your compass to any bearing between 0 and 120 degrees, pick a landmark along the direction of travel and take 15 steps toward it. Stop, add 120 degrees to your initial bearing, pick out a landmark along that bearing and walk another 15 steps toward it, stop and once again increase your bearing by 120, pick out a third landmark and again walk 15 steps. Notice you have arrived back at your original starting location. Let’s return to the example above where we took a 315 degree (or NW) bearing on a rock outcropping, and lets suppose that enroute to the outcropping we encounter an obstacle which we must go around thus forcing us to deviate from our straight line course. If you are lucky enough to be able to pick out a landmark that’s along the bearing, and also on the other side of the obstacle, you have nothing to worry about, just go around the obstacle and get back on course by reaching the landmark and aligning the red end of the magnetic needle over the orienteering arrow, and continue walking.
What are the different types of compasses?
Today, compasses can be classified as one of four types, namely: fixed-dial (the type that you find on a key chain, or that come out of a gum ball machine), floating dial (the needle is an integrated part of the degree dial), cruiser (professional grade instrument used by foresters), and orienteering.
How to find the North Star?
To find it, locate the Big Dipper and follow the two pointer stars at the end of the cup to the tail of the Little Dipper, Polaris is the last star on its tail, see Figure 7. Roughly the distance to the North Star from the Big Dipper is 5.5 times the distance between the two pointer stars forming the non-handle side of the cup. The Big Dipper rotates around Polaris. The North Star can be used to measure declination. At night, place two sticks in the ground lined up with the North Star, with the taller one to the north of the shorter. Set your compass dial at 360, and point the direction of travel arrow north at the longer stick. Look at the compass needle, and note the difference between its bearing and true north, the difference is declination. In the Northern Hemisphere, latitude is obtained by measuring the altitude of Polaris. At the Equator (0° of latitude) the North Star is on the horizon, making an angle or "altitude" of 0 degrees. Whereas at the North Pole (90° of latitude), Polaris is directly overhead making an angle or "altitude" of 90 degrees. Likewise, at 30°N the star is 30 degrees above the horizon, and so on. In other words, in the Northern Hemisphere, if you know your latitude, you can use that as an angle from the horizon to locate the North Star. To measure your latitude, point a stick at the North Star, then measure the angle the stick makes from a level horizon. Note, some compasses, include an inclination gauge (not covered in this article) by which you can easily measure the angle. Determine East and West Via a Shadow: To determine east and west, place a stick in the ground so you can see its shadow (alternatively, you can use the shadow of any fixed object). Ensure the shadow is cast on a level, brush-free spot. Mark the tip of the shadow with a pebble or scratch in the dirt; try to make the mark as small as possible so as to pinpoint the shadow's tip. Wait 10-15 minutes, as the shadow moves from west to east (the opposite side the sun moves on, ie the sun moves from the east to the west -- but both the shadow and the sun move in a clockwise direction). Mark the new position of the shadow's tip with another small object or scratch. Connect the two shadow tip markings with a straight line and you have an east-to-west line approximation. Midday readings give more accurate approximations. To get an exact east-to-west line join the marks from two shadows of equal length. In either the approximate or the exact case stand with the first mark on your left, and the second on your right, and you will be facing toward true north. Pay attention to your own shadow during the course of the day while on a long walk - if you are moving north your shadow will be over your left shoulder at sunrise and over your right shoulder at sunset. You might be the only object to throw a shadow when walking in barren terrain like a desert. Global Positioning System: The U.S. Department of Defense has 24 satellites orbiting the earth, which give off signals that handheld GPS devices can pick up and translate into a user’s position and altitude to within roughly 50 feet. These devices are useful, but are not a replacement for knowledge of the basics of orientation and navigation with a compass and map. Also always remember that a GPS unit is a delicate, battery powered device that can fail or be easily damaged. Never rely solely on, nor allow yourself to become dependent on such a piece of equipment. The tops of pine trees tend to dip to the north. If you do lose your way, keep a cool head - a cool head can accomplish much, a rattle one nothing. Note that lost people tend to wander in circles; as such above all don’t run around aimlessly. First stop, relax, and think, then look around for a familiar landmark, or climb a tree or a hill to try to find one. Estimate the time you have been traveling, and the remaining about of daylight - this will help you figure out how far you have traveled. If possible consult your compass, if not possible pay attention to sunset or sunrise which will indicate east and west, or use a wristwatch as a compass. Consider blazing your way by leaving small marks indicating the direction you have taken such as arrows in the dirt or snow, peeled bark on a tree, toilet paper on a tree branch, and/or rock cairns. If it gets dark it may be best to stay put, as such build a rousing fire, making it easier for others to find you and allowing you to stay warm. At night find the North Star and mark that direction on the ground to guide you come daylight.
What is an orienteering compass?
An orienteering compass is part of the essential survival gear, and most people take one with them into the mountains without knowing actually how in the world does it work.
How to find the direction of a compass?
Start by finding your current location on the map. Let’s say we’re at point A, now set your compass on the map so that the straight side of the base plate lines up with your position. Next, find the point you want to head toward. Let’s say it’s the point B, and rotate the entire compass until it forms a line between point A and point B. Make sure the direction of travel arrow is pointing in the direction of the peak. Once the compass is in position, rotate the bezel until the orienting lines are lined up with north and south on the map. You can use the edge of the map to help you get the position of the lines just right.
How to draw a compass on a map?
Lay your compass on the map and line up its edge with a known landmark. Make sure that the direction of travel arrow is pointing in the direction of the landmark. With the edge of the compass lined up against the object, rotate the entire base plate until the orienting lines are running north-south. And the North marker on the bezel is pointing to North on the map. Once you’ve finished you can draw a line on the map along the edge of your compass. You are somewhere along this line.
How to follow bearings?
Congrats, now you can use the compass to follow the bearing. Pull the compass in front of you with the direction of travel arrow pointing away from you. Now rotate your whole body until the north side of the magnetized needle is inside the orienting arrow. If it helps, you can remember “red in the shed”.
What is the direction of travel arrow?
A direction of travel arrow reminds you which direction to point the compass when you’re taking a bearing. The big arrow called the orienting arrow which we’ll use to help you orient the bezel. Some compasses have a handy declination scale which makes it easier to adjust declination.
How to take bearings with a compass?
A compass with a sighting mirror makes it easy to take very accurate bearings. Hold the compass at eye level and point it at the object. Then tilt the mirror until you can see straight down into the bezel. This way you can see the object and the bezel at the same time.
Where does the needle in a compass point?
The needle in your compass will only point to magnetic north. So right now it’s pointing to somewhere in northern hemisphere not Santa’s workshop. If you don’t adjust your compass to account for the difference between magnetic north and true north, it can really mess up your navigation.
What Do All Good Orienteering Compasses Have?
All good orienteering compasses should have a clear base plate, straight sides, a needle housing filled with liquid, and two separate arrows: one direction arrow and one orienting arrow.
What Two Arrows Should A Good Orienteering Compass Have?
a direction arrow on the base plate, used for pointing the compass from your start point to end point
How To Use An Orienteering Compass
An orienteering compass is used for navigating through unfamiliar or difficult terrain. It will help you find your way, even when the path isn’t clearly marked.
The Best Orienteering Compass
Our top pick for the best orienteering compass is the Suunto MC-2 D/L Mirror Sighting Compass.
What is a compass base plate?
1. The base plate mounting of the compass, with a ruler for measuring scale.
Which end of a compass needle should always point to magnetic north?
3. The compass needle floats on liquid so it can rotate freely, the red end should always point to magnetic north.
Where is the compass scale displayed?
9. Compass scale displayed along the edge of the base plate so you can measure distances on maps.
What is the direction of travel arrow on a compass?
It is fixed parallel to the sides of the base plate and aligned with the fixed index line on the edge of the compass housing (number 6) .
